GPU "Passthrough" in Windows Server 2019
The goal #
Recently, I decided to passthrough my old AMD RX460 to a VM on my trusty PowerEdge R620 running Windows Server 2019 LTSC.
The goal was to have a gaming VM with Steam to play on the go on my powerless laptop, simple enough.
The plan #
The plan was to utilize Hyper-V’s DDA feature, which basically gives the whole GPU to the VM.
This comes at the cost of dedicating one GPU for one VM, though at the moment I have no other plan involving a graphics card on this server…
Hardware Preparations #
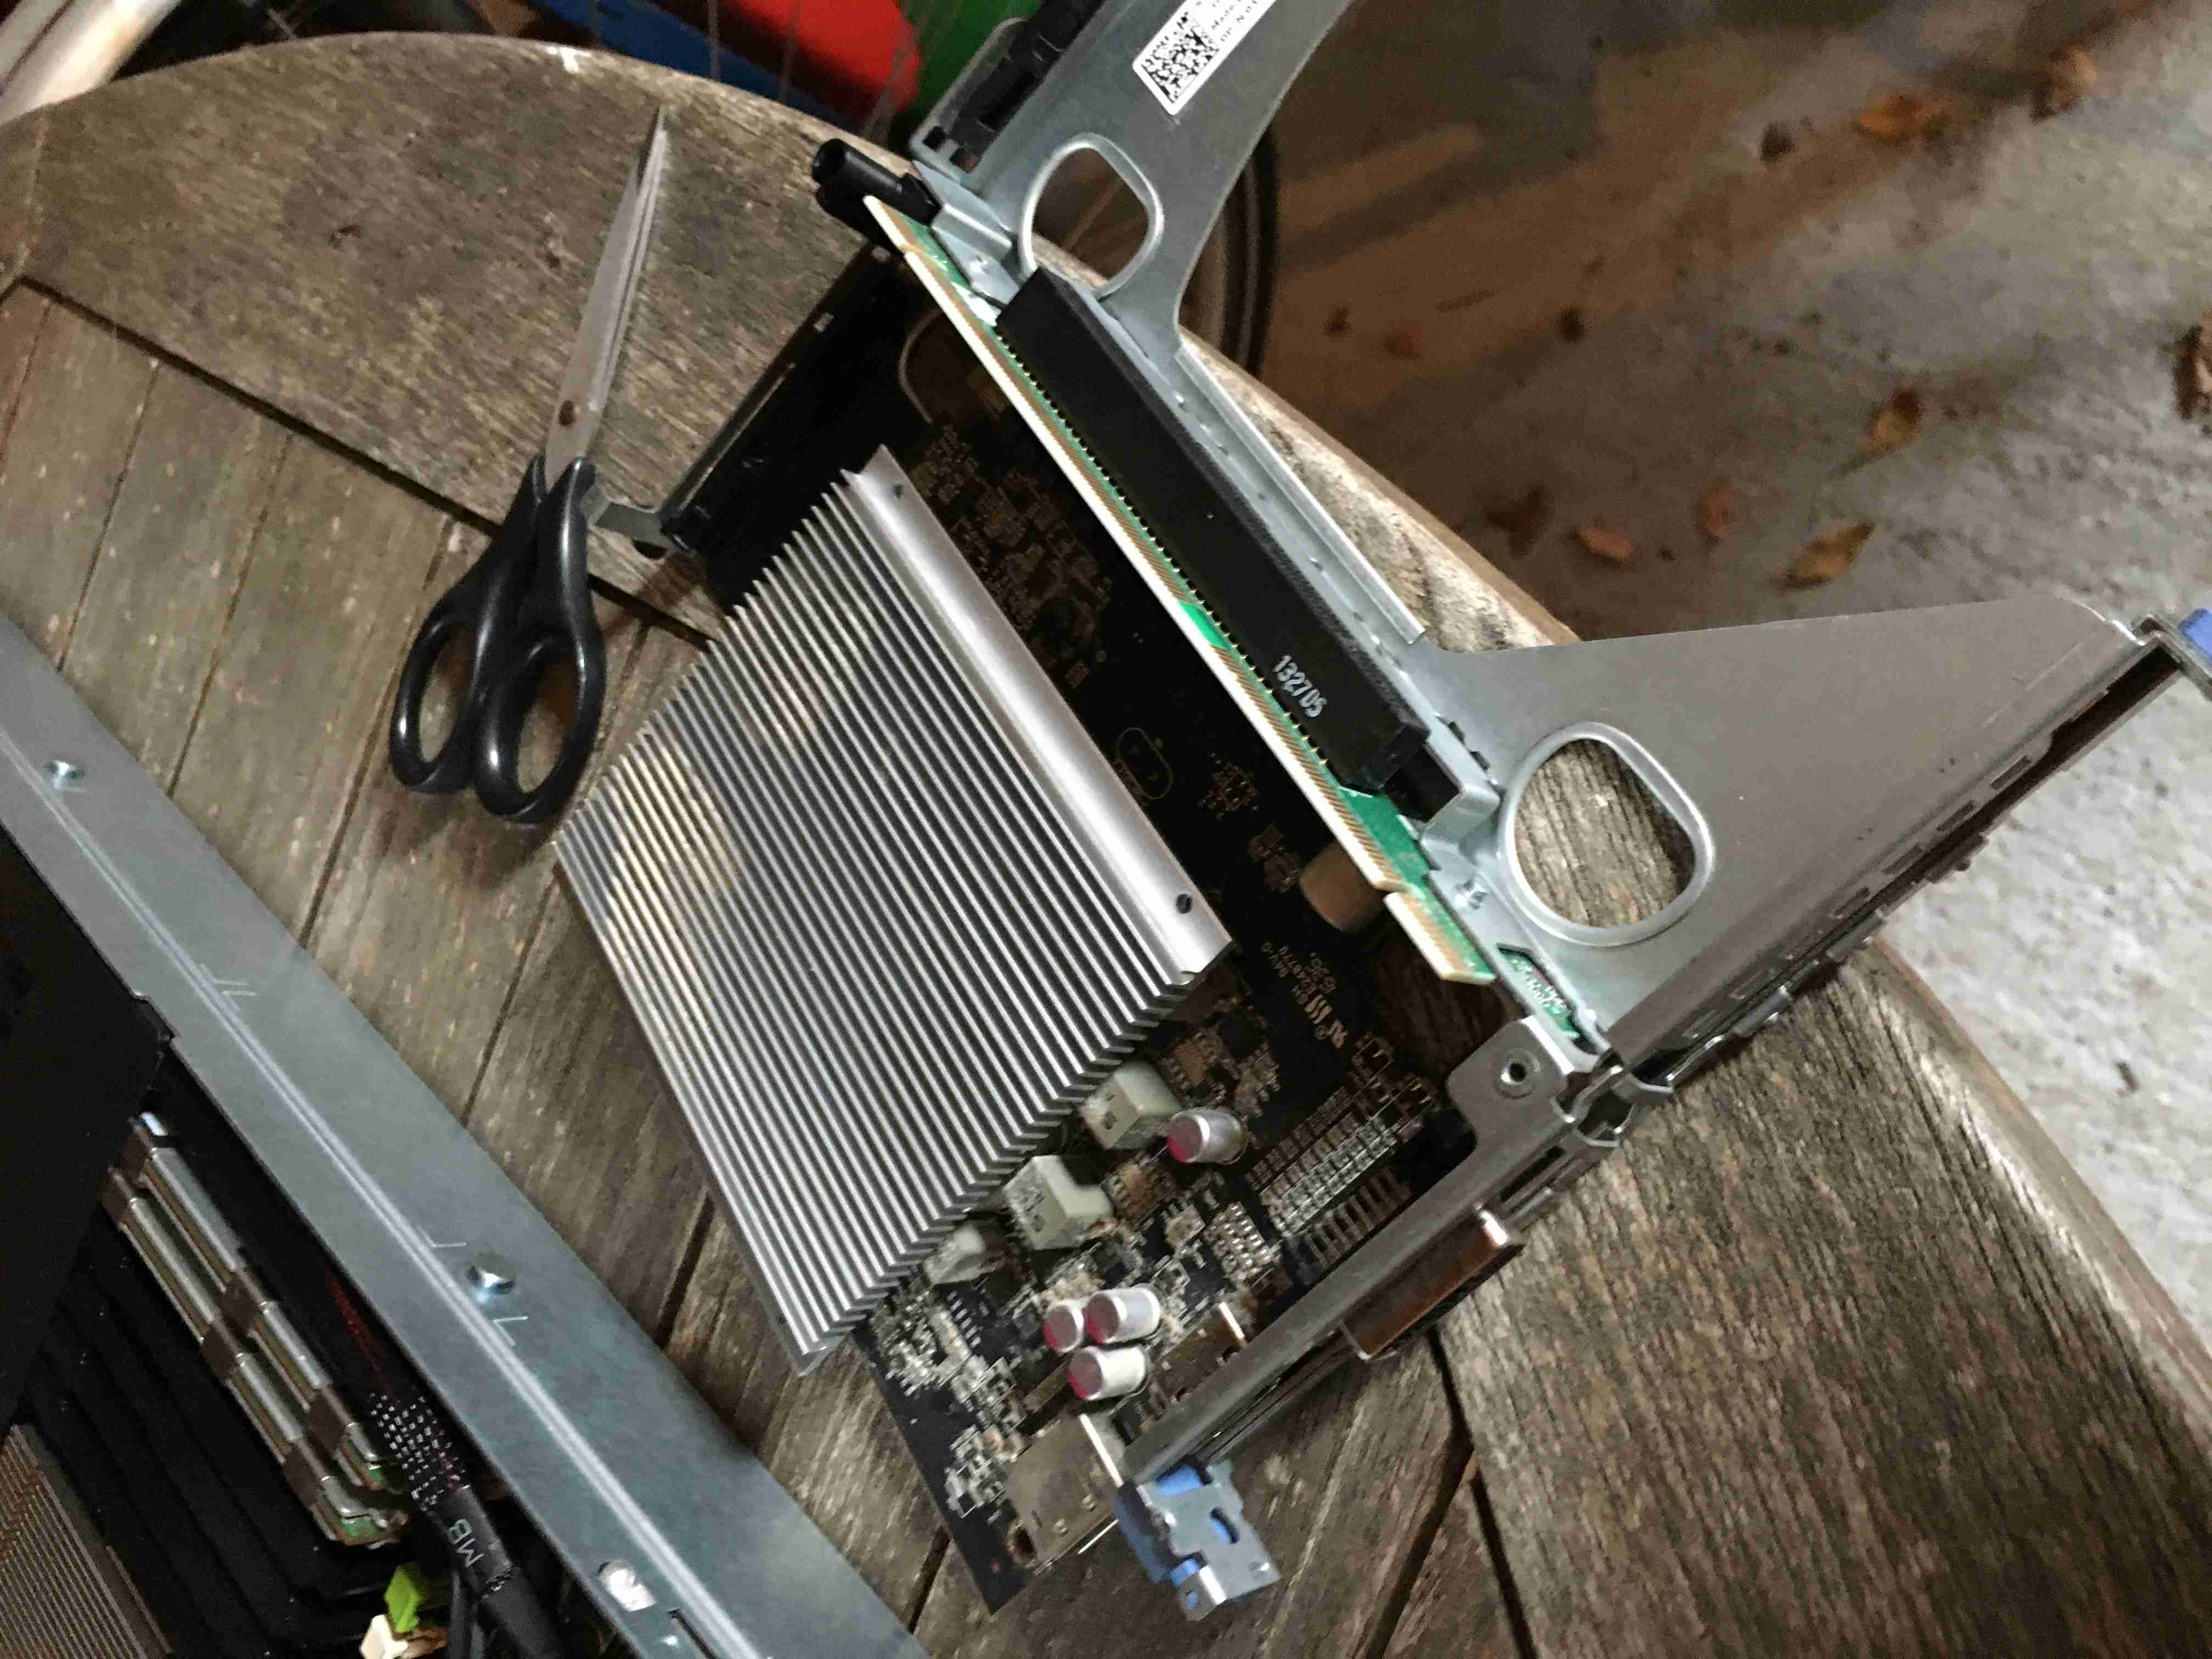
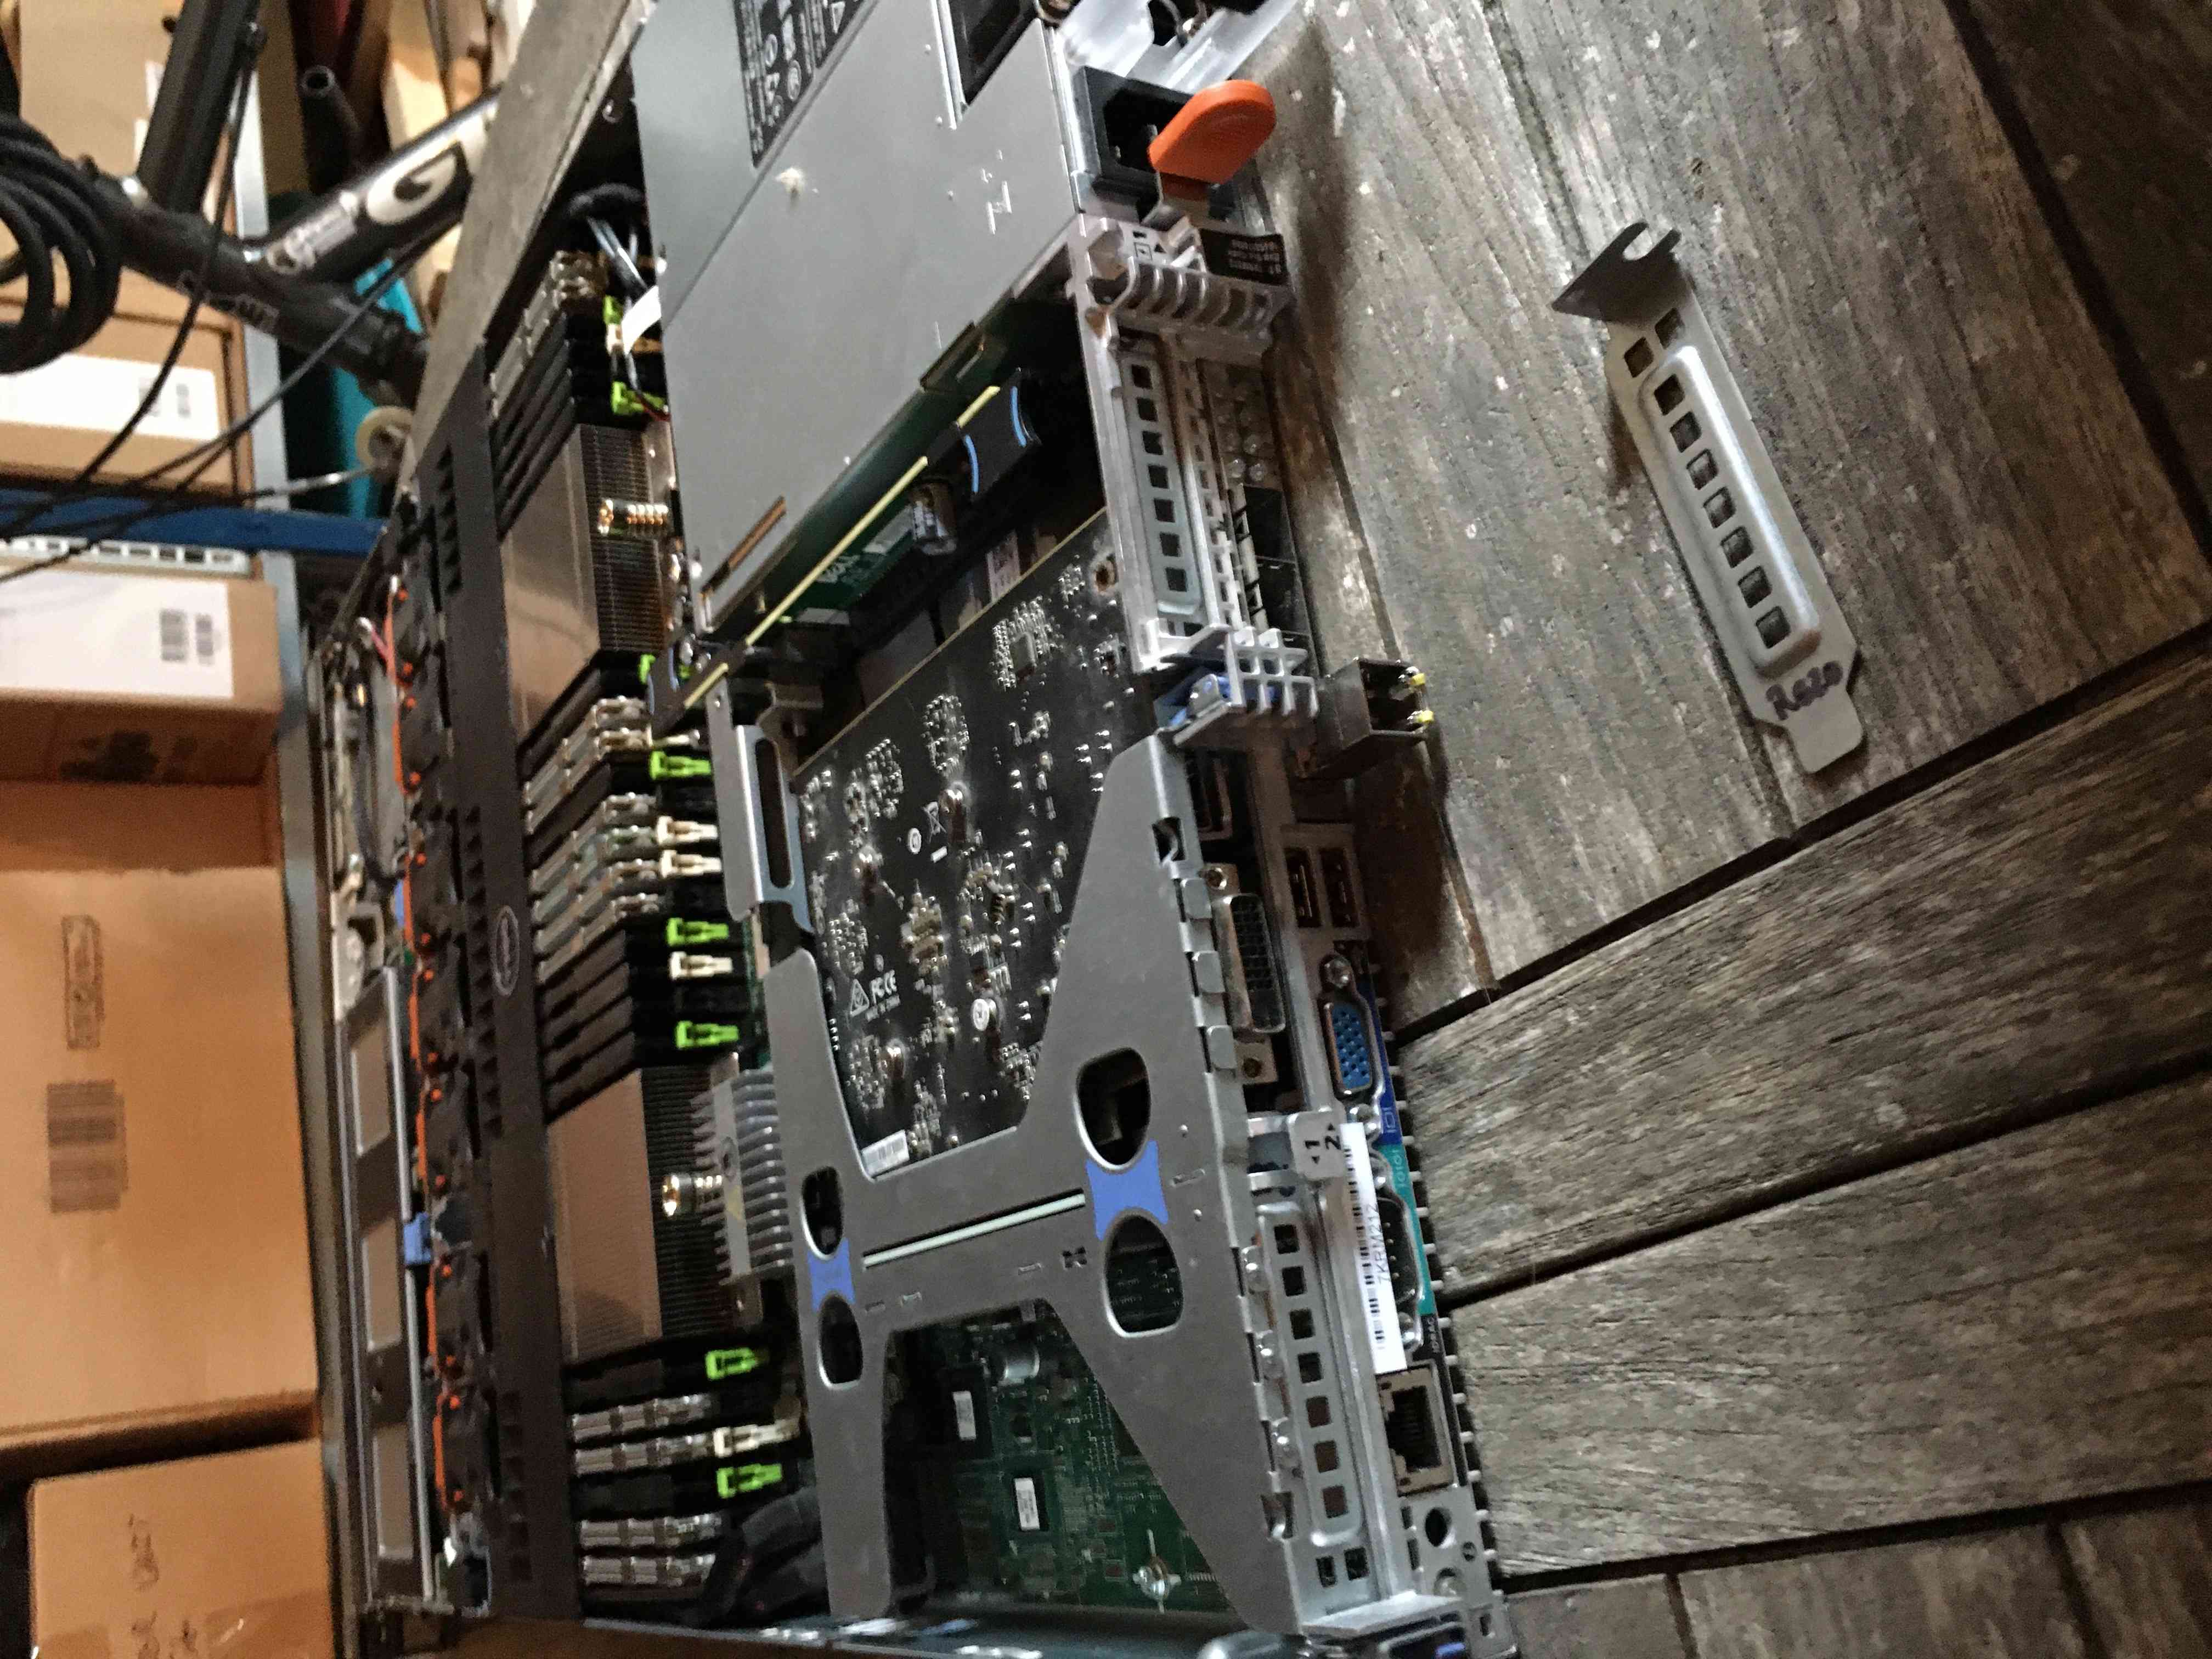
My PowerEdge R620 comes with 3 PCIe slots which only accept 1-Slot-Size, Half-Length, Half-Height cards. The RX460 I have, which is a MSI OC 4G, is dual-slot and full-height, so it’s not a great start for this project…
Luckily, the fan can be removed and reveals a heatsink that is in the “correct” orientation for perfect airflow, this makes the dual-slot problem go away.
As for the full-height, just removing the PCIe bracket and resting the card on the mezzanine network card underneath did the trick.

And that’s it for the hardware, no weird PCIe power connector involved, everything works from the bus power.
Software Configuration #
The Plan: Direct Device Assignement #
Following the guide from Microsoft, I was able to retrieve the GPU location path and assign it to the VM. Way easier than I thought it would be.
Just to make sure, I check Device Manager and there isn’t the dreadful Code 43 error like on some NVidia cards.
Considering the job done, I download the driver, Steam and some games and… it seems painfully slow. As if it was rendering from the virtual Hyper-V Video Output.
After a restart, still no luck. Going back to Device Manager reveals a beautiful Code 43 error. Disabling then re-enabling makes it disappear but the performance is still awful. It’s definitely not using the GPU.
This was the begining of 3 days of struggle with DDA.
After destroying then re-creating the VM multiple times, changing MMIO Space values and trying to install the driver on the host, still no luck and my patience is running out.
The Backup Plan: RemoteFX #
As DDA doesn’t seem to work with my customer-grade AMD card I give up and go the GPU “Sharing” route, even if I’m going to only use it for one VM. It’s still better than nothing.
Enter security vulnerabilites. RemoteFX is sadly thankfully removed from Windows Server 2019 as of February 2021, exactly when I’m trying to use it. This project is at a dead end.
The Solution: GPU-Partitioning #
After some very intense duckduckgoing I found mentions of the spiritual successor of RemoteFX which seems to be simply called “GPU Partitioning”.
It’s been some time since it has been announced but still no official release date (at the time I’m writing). However, it has been rolled out into Windows 10 Pro very recently (around 1809) but not in Windows Server 2019 LTSC (1803), or so it seems.
So with the help of a Reddit post (GPU partitioning is finally possible in Hyper-V) I decided to give it a try.
GPU-Partitioning, the deployment #
How I think it works #
From what I saw, this feature works by providing a virtual renderer device to the VM, simply called “Virtual Render Device”. Then, when a program wants to render, the API calls are sent to the virtual renderer. The host will then “retrieve” these calls and compute on the GPU only to “send” it back to the VM through the virtual device.
At least, that’s how I think it works, but I’m sure it’s way more complicated than that.
Installing a driver on Core #
This feature requires the GPU’s driver on the host, as it is the Host doing the heavylift.
Unfortunately for me, Server Core does not automatically install graphics driver, at least for me.
I downloaded the drivers from AMD’s website, choosing the Enterprise one for “more stability” and maybe more compatibility, or so I hoped.
Sadly, as I guessed Windows Server is not supported by the installer. However, this doesn’t stop me from extracting it and installing it manually.
After extraction, the driver seemed to be located in C:\AMD\Win10_Radeon....\Packages\Drivers\Display\WT64_INF\, so I go and try a pnputil.
pnputil /add-driver /install *.inf
Rebooting finally shows the name of the GPU on the Host and not some “Microsoft Basic Display Adapter”.
PS C:\> Get-PnPDevice -Class Display

Status     Class           FriendlyName                                                                     InstanceId
------     -----           ------------                                                                     ----------
OK         Display         Radeon(TM) RX 460 Graphics                                                       PCI\VEN_1002...
I tried hooking up a display to the GPU output and the image was crisp in full resolution not like before, so it definitely worked.
Assigning the Partition #
For this part, I totally stole the script from the Reddit post aforementioned, not even tweaking it.
$vm = "VM"
Remove-VMGpuPartitionAdapter -VMName $vm
Add-VMGpuPartitionAdapter -VMName $vm
Set-VMGpuPartitionAdapter -VMName $vm -MinPartitionVRAM 1
Set-VMGpuPartitionAdapter -VMName $vm -MaxPartitionVRAM 11
Set-VMGpuPartitionAdapter -VMName $vm -OptimalPartitionVRAM 10
Set-VMGpuPartitionAdapter -VMName $vm -MinPartitionEncode 1
Set-VMGpuPartitionAdapter -VMName $vm -MaxPartitionEncode 11
Set-VMGpuPartitionAdapter -VMName $vm -OptimalPartitionEncode 10
Set-VMGpuPartitionAdapter -VMName $vm -MinPartitionDecode 1
Set-VMGpuPartitionAdapter -VMName $vm -MaxPartitionDecode 11
Set-VMGpuPartitionAdapter -VMName $vm -OptimalPartitionDecode 10
Set-VMGpuPartitionAdapter -VMName $vm -MinPartitionCompute 1
Set-VMGpuPartitionAdapter -VMName $vm -MaxPartitionCompute 11
Set-VMGpuPartitionAdapter -VMName $vm -OptimalPartitionCompute 10
Set-VM -GuestControlledCacheTypes $true -VMName $vm
Set-VM -LowMemoryMappedIoSpace 1Gb -VMName $vm
Set-VM -HighMemoryMappedIoSpace 32GB -VMName $vm
Starting the VM, I installed Windows 10 and Device Manager reports a “Virtual Render Device”. Nice, if it weren’t for the Code 43 on it.
Installing Host Drivers #
This error comes from the lack of driver in the guest OS. To fix it, you need to copy the drivers from the host into the guest, but in the HostDriverStore folder.
This leads to finding which folder in C:\Windows\System32\DriverStore\FileRepository\ is the correct one. Normally, just running dxdiag would give this information, but Server Core doesn’t come with it.
However, there exists a WMI Object named Win32_VideoController which has a field called InstalledDisplayDrivers. Finding which folder is as simple as running this command in PowerShell:
(Get-WmiObject Win32_VideoController).InstalledDisplayDrivers
C:\Windows\System32\DriverStore\FileRepository\u0360165.inf_amd64_b17c6d4b8b29665a\B360600\aticfx64.dll,C:\Windows\System32\DriverStore\FileRepository\u0360165.inf_amd64_b17c6d4b8b29665a\B360600\aticfx64.dll,C:\Windows\System32\DriverStore\FileRepository\u0360165.inf_amd64_b17c6d4b8b29665a\B360600\aticfx64.dll,C:\Windows\System32\DriverStore\FileRepository\u0360165.inf_amd64_b17c6d4b8b29665a\B360600\amdxc64.dll
Now it’s just copying the u0360165.inf_amd64_b17c6d4b8b29665a folder with all its subfolders and DLLs into the C:\Windows\System32\HostDriverStore\FileRepository folder in the guest.
Testing #
After a reboot, the Code 43 disappeared and running dxdiag shows a render tab with the drivers vrd.sys loaded.
Now I can finally install Steam and some games to try it out.

Conclusion #
This feature is definitely not currently supported for production use by Microsoft but it seems to be working fine in games without a lot of performance loss, though I tried some pretty lightweigh games such as Yakuza 0.
I hope this post entertained you or helped you find a solution with this nice feature :)
Troubleshooting #
Code 43 after “installing” the driver #
Please make sure you updated Windows 10 to the latest version.
